Published on:
10 min read
Excavator Work Guide: 7 Smart Tips Before You Buy
Buying an excavator is one of those decisions that looks simple on paper and gets expensive fast in the real world. The wrong machine can sit underused, burn too much fuel, struggle on tight sites, or force you into constant attachment swaps that kill jobsite productivity. This guide breaks down seven smart tips buyers should work through before signing a quote, from sizing and transport limits to hydraulics, undercarriage wear, ownership costs, and dealer support. You’ll get practical examples, realistic numbers, and a balanced look at where buyers overspend, where they cut corners, and how to match a machine to the type of work you actually do. Whether you’re a contractor buying your first compact excavator or a fleet manager replacing a mid-size unit, the goal is simple: make a purchase that earns money instead of creating avoidable downtime.
- •Why buying the right excavator matters more than buying the biggest one
- •Tip 1 and Tip 2: Match the machine to your core jobs and your transport reality
- •Tip 3 and Tip 4: Look beyond horsepower and pay close attention to hydraulics, attachments, and undercarriage wear
- •Tip 5 and Tip 6: Calculate total cost of ownership and judge the dealer as hard as the machine
- •Tip 7: Choose features that improve operator output, safety, and resale value
- •Key Takeaways and practical buying checklist
- •Conclusion
Why buying the right excavator matters more than buying the biggest one
A surprising number of excavator purchases go wrong for one reason: buyers focus on machine size before they define the work. That usually leads to overbuying. A 20-ton excavator may look like the safer long-term choice, but if most of your work is residential trenching, septic installs, backyard grading, and utility repair, a compact or mid-size machine often produces better profit because it moves easier, fits more sites, and costs less to run.
Start with a simple job breakdown from the last 12 months. How many jobs required deep digging, heavy lifting, hammer work, or mass excavation? How many involved tight access, finished driveways, landscaping, or frequent transport between jobs? If 70 percent of your work happens on constrained sites, tail swing, width, and transport weight matter more than maximum bucket breakout force.
Here is the practical risk of buying too large:
- Higher purchase price and insurance costs
- More fuel burn per hour
- Extra transport permits or heavier trailer requirements
- More ground damage on finished sites
- Lower flexibility on small urban jobs
- Slower cycle times on production work
- Limited lifting capacity for pipe, vaults, or concrete structures
- Reduced hydraulic performance with demanding attachments
- Faster wear when the machine is pushed beyond intended duty
Tip 1 and Tip 2: Match the machine to your core jobs and your transport reality
The first smart tip is to define your top three job types before you compare brands. Excavators are sold with broad performance claims, but what matters is how the machine behaves in your actual work mix. A contractor doing drainage and foundation digs needs different priorities than a tree service using a thumb and grapple, or a demolition crew running breakers and processors.
Write down the tasks that make you money most often: trenching depth, lifting needs, bucket sizes, attachment use, operating hours per week, and average ground conditions. If your jobs require frequent attachment changes, auxiliary hydraulic flow and coupler compatibility should rank high. If your operators spend hours working beside structures, visibility and smooth controls may matter more than peak dig force.
The second tip is to treat transport as a buying filter, not an afterthought. In the United States, many buyers discover too late that a machine’s operating weight pushes them into a different trailer class, a CDL issue, or permit headaches depending on local rules and total combination weight. Even a small jump in machine size can trigger higher hauling cost on every move.
Consider these pros and cons when stepping up a size class:
- Pros:
- More reach and lift capacity
- Better stability on heavier buckets and attachments
- Faster production on open sites
- Cons:
- More expensive trailer and tow vehicle requirements
- Reduced access through gates and tight lots
- Higher fuel and maintenance cost
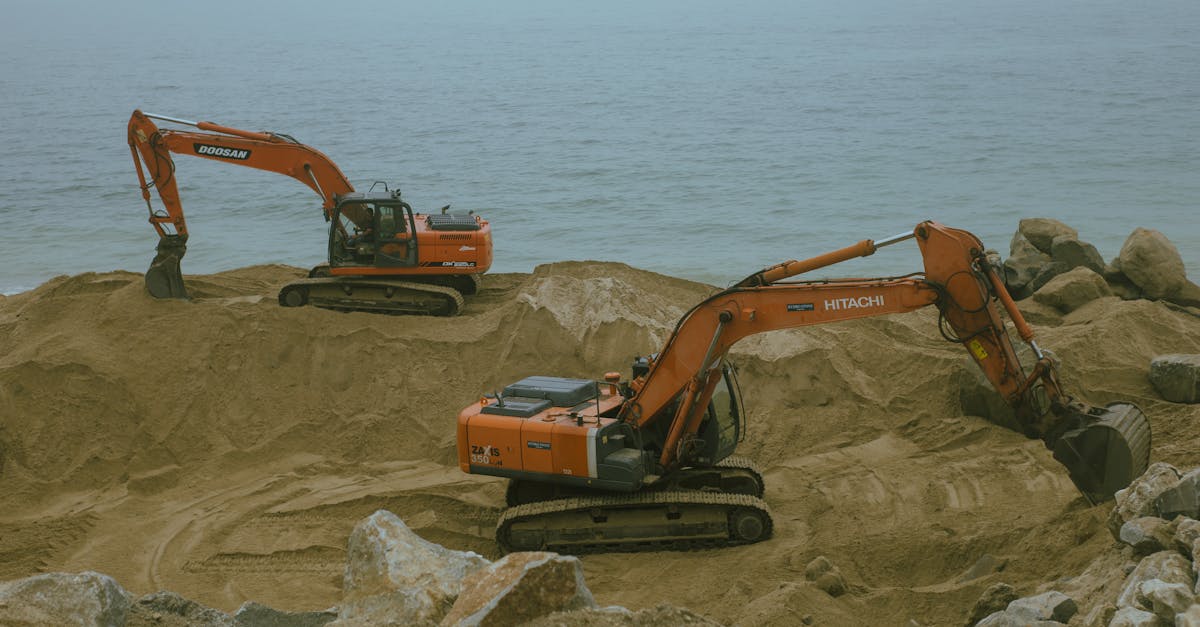
Tip 3 and Tip 4: Look beyond horsepower and pay close attention to hydraulics, attachments, and undercarriage wear
Many first-time buyers compare horsepower, digging depth, and sticker price, then overlook the systems that affect daily productivity. Tip three is to evaluate hydraulics based on attachment use. If you plan to run a breaker, auger, compactor wheel, tilt bucket, or tiltrotator, ask for exact auxiliary flow and pressure figures, not vague claims. A machine can be excellent for general digging and still underperform badly with demanding tools.
Ask the dealer whether the machine includes one-way and two-way flow, programmable attachment settings, case drain provisions, and an easy coupler setup. These details save time. On a busy crew, five to ten extra minutes per attachment change adds up over a month. Operators also work better when hydraulic response is predictable instead of abrupt.
Tip four is to inspect the undercarriage as if it were a second engine, especially on used machines. Industry veterans often say undercarriage replacement can represent around 20 to 50 percent of tracked machine maintenance cost over its life, depending on application and operating habits. That is why cheap used excavators can become expensive fast.
Check these wear points carefully:
- Track chain stretch and pin wear
- Sprocket tooth shape
- Roller leakage or rough movement
- Idler wear patterns
- Uneven shoe wear from poor tracking habits
- Slop in boom, arm, and bucket pins
- Pros of buying a used machine with documented maintenance:
- Lower upfront capital cost
- Less depreciation in the first years
- Faster payback if utilization is steady
- Cons:
- Higher risk of hidden hydraulic and undercarriage repairs
- More downtime if service history is weak
- Fewer technology and warranty advantages
Tip 5 and Tip 6: Calculate total cost of ownership and judge the dealer as hard as the machine
Purchase price is only the entry fee. Tip five is to build a simple total cost of ownership model before you buy. Include monthly payment or lease cost, insurance, fuel, routine service, wear parts, transport, attachment expense, and expected resale value. Fuel alone can create a meaningful gap between two machines. A compact excavator might burn roughly 1.5 to 3 gallons per hour in lighter work, while larger units can go far beyond that depending on load and duty cycle. Over 1,000 hours, that difference matters.
Also estimate downtime cost. If your machine generates $125 to $250 per billable hour and loses two days waiting for a common part, the real cost is more than the repair invoice. It is missed revenue, crew disruption, and sometimes rental substitution at premium rates.
Tip six is to evaluate dealer support with the same discipline you use on specs. A great excavator backed by weak parts and service support is a poor business asset. Ask hard questions. What is the average turnaround for hydraulic hoses, filters, glass, undercarriage parts, and electronic components? Do they offer field service? Are loaners or short-term rentals available when major repairs happen?
A dealer assessment should include:
- Parts availability and delivery speed
- Mobile service coverage area
- Technician reputation in your region
- Warranty clarity and exclusions
- Trade-in flexibility later
Tip 7: Choose features that improve operator output, safety, and resale value
The seventh smart tip is to prioritize features that make operators faster, safer, and less fatigued. This is not a luxury issue. A comfortable, intuitive machine usually produces cleaner work and fewer mistakes. In tight labor markets, machine choice can also help retention. Skilled operators notice poor visibility, awkward control response, bad seat support, and noisy cabs immediately.
Features worth paying for depend on your work, but several consistently earn their keep. Rear and side cameras help in congested sites. A hydraulic quick coupler reduces downtime during bucket and attachment changes. Pattern changers matter if multiple operators use the machine. Grade control and 2D or 3D assist technologies can be expensive, yet they often pay back quickly on utility, foundation, and site-prep work where rework is costly.
Think about resale, too. Machines with common coupler systems, strong service history, clean telematics records, and desirable options tend to move faster in the used market. Buyers looking at late-model excavators often pay more for documented maintenance and operator-friendly specifications than for raw engine power.
A balanced view helps:
- Features that usually add value:
- Quick coupler, thumb, auxiliary hydraulics, camera package, good lighting, telematics
- Features that need a clearer business case:
- Advanced grade systems, specialty guarding, premium attachment packages if you use them rarely
Key Takeaways and practical buying checklist
If you only remember one thing, remember this: the best excavator purchase starts with job analysis, not brand loyalty. Buyers get into trouble when they shop by emotion, copy a competitor’s setup, or assume larger machines automatically produce higher margins. The smartest purchases are grounded in utilization, transport constraints, attachment demands, and dealer support.
Use this practical checklist before signing anything:
- Review your last 12 months of work and identify the top three revenue-producing job types
- Confirm access limits on your typical sites, including gates, overhead obstacles, and ground sensitivity
- Check transport weight, trailer capacity, and any licensing or permit implications in your area
- Verify auxiliary hydraulic flow, coupler compatibility, and attachment settings
- Inspect undercarriage, pins, bushings, and service records carefully on used units
- Build a one-year and five-year ownership cost estimate, including downtime assumptions
- Call the dealer’s parts desk before you buy and test response quality yourself
- Ask operators which features reduce fatigue and improve cycle time
Conclusion
Before you buy an excavator, step back and define the work, the transport limits, the attachment needs, and the support system that will keep the machine earning. That process is what separates a profitable asset from an expensive compromise. Focus on fit before size, hydraulics before brochure hype, ownership cost before sticker price, and dealer responsiveness before last-minute discounts.
Your next step should be practical: shortlist two or three machines, request full spec sheets, calculate your yearly operating cost, and inspect at least one comparable used unit to sharpen your judgment. Then involve the people who will actually run and maintain the machine. A well-chosen excavator can improve productivity for years. A rushed purchase can drain margin just as long.
Published on .
Share now!
VS
Violet Stevens
Author
The information on this site is of a general nature only and is not intended to address the specific circumstances of any particular individual or entity. It is not intended or implied to be a substitute for professional advice.